BIAB + Micro French Tips: Easy DIY Salon Nails at Home (Beginner-Friendly Guide) 💅✨
There’s something about a perfectly polished set of nails that just makes you feel put together, even on your most chaotic days. But we’re not talking about just any manicure. We’re talking about the micro French tip. It’s a modern, minimalist take on the classic French manicure. It’s subtle. It’s chic. It’s the kind of effortless beauty that makes you feel like you’ve got your life together (even if you’re still sipping coffee at noon in your robe. No judgment here).

If you’ve been searching for an easy, beginner-friendly way to achieve salon-quality nails at home, you’re in the right place. This guide will walk you through every single step so you can master the art of micro French tips. Because polished nails are self-care, and we’re here for it.
✨ Why Micro French Tips?
There’s something timeless about a French manicure, but micro French tips take it to a whole new level. Think delicate, ultra-thin lines that add just the right touch of elegance without being overpowering.
✔ Minimalist & sophisticated—perfect for any occasion
✔ Looks stunning on all nail lengths & shapes
✔ Grows out seamlessly (aka, fewer touch-ups = less maintenance)
✔ Pairs beautifully with any outfit
It’s the ultimate “clean girl” aesthetic. Simple, classy, and effortlessly beautiful!
💅 Everything You’ll Need
Before we dive in, let’s set the vibe. Light a candle, turn on some lofi beats, and gather your nail essentials.
🛍 The Must-Haves:
🔗 Beetles Nail Prep Kit — because a solid base is everything
🔗 Beetles 3 Pcs Builder Gel Set — for strength & structure
🔗 Beetles 20ml Cuticle Oil — hydration = happy nails
🔗 MelodySusie Cordless Nail Drill — for precise, clean prep
🔗 MelodySusie Nail Drill Bits Small Sanding Bands — the secret to a salon-quality finish
Other Essentials:
✔ 180-grit nail file (for shaping + prepping)
✔ Fine liner brush (for that delicate micro-tip)
✔ White gel polish (because crisp, clean lines are the goal)
✔ Gel base coat & top coat
✔ UV/LED lamp (for long-lasting results)
Now that we have everything, let’s get into the step-by-step magic.
🔎 Step-by-Step: How to Achieve the PERFECT Micro French Tips
1️⃣ Step 1: Nail Prep = Long-Lasting Results
We’re all about longevity. A well-prepped base means your manicure will last 2+ weeks without chipping or peeling.
✔ Remove old polish and shape your nails (almond, square, or oval work beautifully).
✔ Push back your cuticles—gently! This step keeps your nails looking clean.
✔ Buff the nail surface lightly to remove shine (this helps the gel stick better).
✔ Apply a nail dehydrator followed by a nail primer. This ensures better adhesion and longer-lasting results.
✔ Apply a thin layer of base coat and cure under a UV/LED lamp for 60 seconds.
✨ Pro Tip: If your nails are on the thinner side, add a layer of builder gel for extra strength.

2️⃣ Step 2: Apply 2 Coats of Builder Gel for Extra Strength & Durability
We’re not just doing this for a cute look. We want long-lasting nails that hold up. This step is key if you want your French tips to stay fresh, strong, and chip-free!
✔ Apply a thin layer of builder gel to your nails. This first layer will create a smooth base for the tips to shine.
✔ Cure under your UV/LED lamp for 60 seconds.
✔ Then, apply a second coat of builder gel. This second layer adds even more strength, giving your nails that perfect durability.
✔ Cure the second coat under the UV/LED lamp for another 60 seconds. Trust me, that cure time is your friend!
✔ After curing, reshape your nails with a file for a clean, polished look.
✨ Pro Tip: Builder gel gives your nails a little extra TLC. If you have weak or bendy nails, you NEED this step. It’ll change your life.

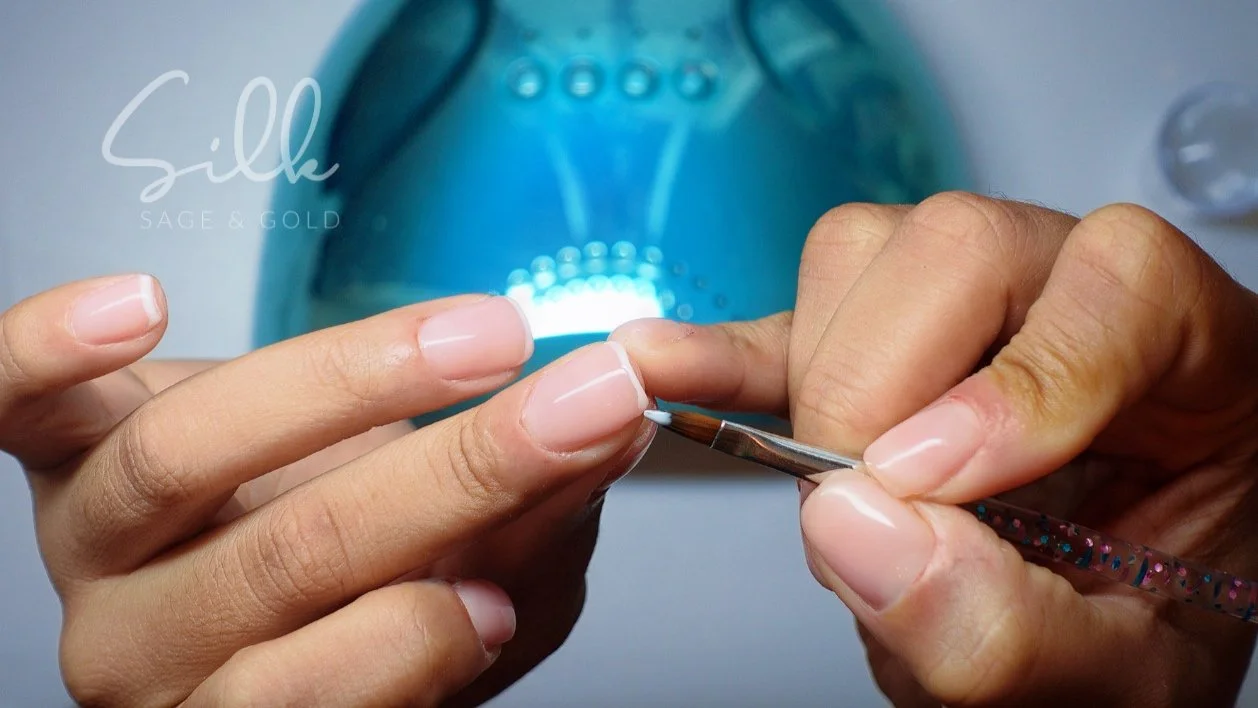
3️⃣ Step 2: The Secret to the Cleanest Micro Tips
The beauty of micro French tips lies in their precision. The key? A fine liner brush.
✔ Dip your brush into white gel polish and start with a thin, delicate line along the tip.
✔ If freehanding isn’t your thing, use French tip guides for extra precision.
✔ Refine the line with a clean-up brush dipped in acetone for that crisp, salon-perfect look.
✔ Cure under the UV/LED lamp for 60 seconds.
✨ Pro Tip: Less is more. Keep your strokes light, and don’t overload your brush with polish.
4️⃣ Step 3: The Final Touch—Glossy or Matte?
✔ Seal your design with a top coat (glossy for a classic look, matte for a modern twist).
✔ Cure under the UV/LED lamp one last time.
✔ Hydrate your cuticles with nourishing serum/oil—because healthy nails = happy nails.
Now take a moment to admire your work. Effortless. Elegant. Timeless.

📌 FAQ: Your Micro French Tip Questions, Answered
💬 How long do micro French tips last?
With the right prep and a quality top coat, your manicure can stay flawless for 2-3 weeks without chipping.
💬 Can I do micro French tips on short nails?
Absolutely! Micro French tips are perfect for short and long nails alike. The delicate, ultra-thin line adds a subtle elegance to any length.
💬 What’s the best nail shape for micro French tips?
Almond, square, and oval are classic choices for that sleek, polished look. But honestly? Go with whatever makes you feel fab!
💬 Do I need a UV or LED lamp for micro French tips?
Yes! Gel polish requires curing under a UV or LED lamp to ensure it hardens properly and lasts without chipping. If you’re using regular polish, just be sure to allow extra drying time.
💬 What’s the best white polish for French tips?
A highly pigmented white gel polish works best for that crisp, clean tip. If you’re struggling with application, try a liner brush for extra precision.
💬 Can I do micro French tips with regular polish?
Absolutely! While gel polish is more durable, you can achieve a similar look using regular polish. Just be patient with drying time, and always apply a good top coat for longevity.
💬 How can I keep my micro French tips from chipping?
The key is proper prep! Buff your nails lightly, apply a base coat, and don’t skip the builder gel if your nails are on the thinner side. And always finish with a top coat to lock everything in.
💬 How do I get both hands to look even?
Steady hands take practice! Try using French tip guides for extra precision, or paint your dominant hand first so it’s easier to correct any mistakes. And don’t stress—nobody’s looking that close!
💬 Can I add color to my micro French tips?
Absolutely! Micro French tips aren’t just for white polish. Try fun colors like pastels, bold neons, or even metallics for a fresh twist on the classic look.
💬 What should I do if my French tips aren’t even?
No worries, it happens! Grab a small cleanup brush dipped in acetone to sharpen your lines. A little patience goes a long way for that perfect finish.
© 2025 Silk Sage & Gold. Written by Tyasha.
This post and its content are **protected and may not be reproduced** without permission. Sharing the link is encouraged, copying the words… not so much. ✨